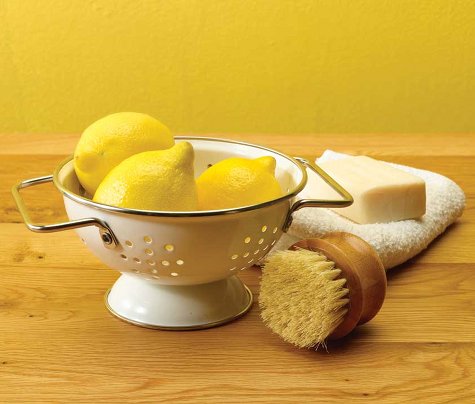
If you've been or lived in NYC you know about Fishs Eddy. A sweet little kitchen/tableware shop full of treasures. I've filled my cabinets and counters with their goods ever since I moved here over 11 years ago. Pie stands (which I use for plates), glass storage containers, jars we used at our wedding as vases, gifts of juice glasses with cheeky images, tote bags to lug my stuff around town...I could go on...
I discovered this morning that they have an online shop! So all you out of towners can now purchase their goods instead of filling your suitcase with their goods (plus tons of bubble wrap to protect). Rejoice! Here are my picks, through an eco friendly lens of course.
It's that time again, time to get into all those nooks and crannies that dust bunnies just love to hide out in. If you're seeking new products look no further than your kitchen cabinets for some quick and easy DIY chemical free remedies to the dirt, grim and dust bunnies in your home. Use some old containers (jars, yogurt cups, etc.) to store your new cleaning products in and you're ready to go!
Floors scuffed? Apply a few drops of tea tree oil to the spots, then wipe excess oil up with a cloth, after that rub in distilled vinegar. Poof. Scuffs gone.
Gum stuck to something? Orange Oil is spectacular at removing this. Apply with cotton ball then toss item in the laundry (if it is a cloth item that is)
Floors dirty? Mop with this solution:
1/4 liquid Castile soap (I like Dr.Bronner's) and 2 gallons of warm water. If they are greasy just add about 1/4 cup of distilled vinegar to the bucket.
Use that same Castile soap to clean stovetops + vents. Simply squirt a few squirts into 2 cups of hot water. Then you swipe up the grease that's gathered on your burners, stovetop and hood. Lovely.
Stainless-Steel counter tops/surfaces? Buff with a few drops of olive oil. yes olive oil. trust me.
Permanent marker stains (aka do you have children?) on your wood floors or countertops? Use rubbing alcohol with a cotton ball to remove.
Have an extra lemon lying around? Brighten whites by adding 1/2 cup lemon juice to the rinse cycle. Or...use that same lemon and combat lime scale, rub lemon juice on spot, let sit overnight and wipe with a wet cloth in the morning. Easy as pie.
Now's the time to stock up and save some green. Earth Day is April 22nd, just a few days away. What are you planning? Juliette and I have some crafts on the menu for our Earth Day celebrations. We are going to color and decorate pictures of the planet. All materials are going to be things I find around the house like old magazine pages, fun grains/seeds from the kitchen to use as decoration and anything else we can utilize.
We're going to make sure that day we eat as local as possible, organically of course and avoid any unnecessary waste (we do this as often as possible anyways, but on Earth Day it's important to reinforce and revive!)
Here are some great things from around the web to get you saving some cash on your earth friendly products as well as fun things to create and do to kick start your brand new eco friendly you!
I've blogged about this recently, a must this April. Pick up your beauty essentials from Pangea at 25% all month!
Save on a ton of earth friendly products at Diapers.com here are some codes for you to use:
* save $3 bucks on Earth's Best Diapers with code EBSAVE3
* save on 'Green' clothes with code DRESSGREEN
* save on all Plan Toys with code APRILPLAN
and my favorite, save on this great picnic kit complete with hand wipes, snacks, spoons, bowls and reusable napkins!
A sweet little guide to going green, all things you can do yourself, cheaply. No solar panel installation, I promise.
Love etsy as much as I do? Well here's an eco decor guide with all items found on etsy. lovely.
Free organic socks for your kiddo when you purchase these shoes from See Kai Run.
Hit up Starbucks for your morning brew? If so bring your own coffee tumbler or mug on Earth Day and score a free brewed coffee or tea (hot or cold). Nice.
Save on your home care products at Soap.com with their Earth Day Bundles!
Sweet little vegan ballet flats from etsy. Found via one of my favorite eco blogs Fig and Sage
13 Green Lifestyle Experts tell us their Earth Day Plans! via Tree Hugger
Sign up NOW for flash eco sales (just think, guilt free shopping!) with this invite code at Pure Citizen. Right now they've got Sigg and Revolution Organics! Sweet.
This week I joined a CSA share. I am terribly excited! I've never had a share of my "own" and I feel its a big step towards truely investing in the land around you. Ie: hyper local! Support a farm, chose organic and get cooking. I found this farm through the MOFGA website under 'Maine CSA Directory'. (Search for CSA and Farm directories in your area, by county).
Loving the name of it, New Beat Farm. They are certified Organic by MOFGA and use horse power. Best of all is that they drop off on Munjoy Hill. I get to walk 3 blocks and have my share?! Done deal. I was looking for ways to lessen the "chore" of certain tasks in my life and this became clearly the way to go for me. Couldn't be happier than a clam in mud, new england mud. Also biggest highlight is showing my daughter the fruits of the earth and meeting other farmers. Now, spring, whereare you?!
Next up we have homemade almond milk. I made one batch: 3 cups milk created from just 1 cup of almonds! Total cost: under $2.00. It took all of an overnight soak and then some blending. Preferable you will chose unsalted raw almonds, but it does not matter entirely. I used roasted unsalted ones.
**(insert both pictures)**
Homemade Almond Milk
Makes 3 cups
Making your own almond milk is very easy, just plan ahead to allow time for soaking the almonds.
Ingredients
1 cup almonds
Water
Method
Put almonds in a bowl and cover by several inches with cold water. Cover and set aside at room temperature to soak overnight or 10 to 12 hours.
Drain and rinse almonds. In a high speed blender, blend almonds with 3 cups water until thoroughly combined. The mixture will be very frothy. Strain through cheese cloth, a fine strainer or a nut milk bag. Store almond milk in refrigerator and use within 3 days. Stir before using.
Nutrition Per serving (about 1cup/ 9oz/258g-wt.): 90 calories (35 from fat), 4g total fat, 0g saturated fat, 0mg cholesterol, 10mg sodium, 13g total carbohydrate (1g dietary fiber, 12g sugar), 2g protein
**suggestion: for added sweetness, I would blend 1 tbl honey into the mix, and maybe a pinch of cinnamon. Almond milk is straight up un-sweet, real-deal. But it is good and oh so good for you!
Ok, so I don't have a full blown cold yet, yet. I feel that wave of what's to come is near but I am doing ok so far. So in anticipation I am reading up on how to treat myself naturally. I am taking my vitamins, and my homeopathic meds are standing by ready to aid in the fight. I came across a great article on Planet Green and wanted to share some of the DIY home remedies you too can whip up at home for yourself or a loved one.
My colds ALWAYS start with a sore throat, so this is by far something I simply MUST try!
Lemon Throat Spray Lemon is a traditional sore throat soother, and this handy spray can be put into a spray bottle of any size (look for travel-size spray bottles to take some with you when you're on the go) and stored in the fridge for up to two weeks. Combine:
15 drops lemon essential oil
5 drops peppermint essential oil
¼ cup water
¼ cup lemon juice
Add the ingredients to a spray bottle and store it in the fridge. Shake it before each use, using as often as necessary to soothe sore throats.
Sore Throat Gargle with Sage (or Hyssop)
Sage is another traditionally calming herb. We see it often in recipes for mouthwashes because of its anti-inflammatory properties. Here, it infuses a throat gargle. Hyssop leaves have many of the same properties, and would work in this recipe as well.
Boil one cup of distilled water and pour over one tablespoon of fresh sage or hyssop leaves (or one teaspoon of dried leaves). Allow the herbs to steep for 20 minutes. Strain the tea, and add 1/8 teaspoon of salt. Store in the refrigerator for two to three days, gargling whenever you need some relief from your sore throat.
Check out article for a few more great ideas! While it's easy to run to the store and pick up a box of pills, making it this way just seems better doesn't it?
I came across the most amazing, innovative and cool DIY site that you simply MUST check out! Click here to go straight to Between the Lines for tutorials on such awesome things as DIY heart garlands, ornaments and a denim and leather tote I am desperate to make myself!
They've got tons of great earth lovin' DIY projects all of us (yes, even you) can do. Check out a few of my favorite here:
1. Take an ironed adult size T-shirt, right side out. (You could use a kid's T-shirt for a smaller sized bag).
2. Fold it in half as shown in picture 2.
3. Cut off the sleeves as shown in picture 3 and put them aside as you'll need them later to make a little pouch.
4. Cut around the neck-line as shown in picture 4.
5. Sew the bottom of the shirt closed using a French seam. If you're not familiar with the French seam check out this post. (Basically, you sew the hem closed on the right side, turn the bag inside out and sew another seam, sandwiching the first seam inside). Next, sew boxed corners, as explained here, in step 1. You could iron everything flat now, if you like.
6. Place the bag in front of you on a flat surface. Starting from the bottom, fold over the bag as shown in picture 6, about 2 1/2 inch, that is.
7. Now, starting about 3 inches from the side, with your scissors make 1/2 an inch to 3/4 of an inch cuts through all layers, leaving about 1 1/8 inch between every cut. Continue like this all the way to the other side and stop about 3 inches from the side seam.
8. Next, fold it over some more (an additional 2 to 2 1/2 inch) and repeat the cutting, but now right in between two cuts from the previous line, as shown in picture 8.
9. Go on like this a couple more times, depending on the size of your bag - I did 5 rows in total.
We're still in summer mode here, though for K. today is the last day of his summer vacation, unfortunately. This year's summer vacation has been very relaxing - Carpe Diem (seize the day) has been our motto. We've been doing plenty of things but only because we wanted to. And today I really wanted to do something crafty! So I did. It took me a while before I came up with something, though. I made a big mess as I kept pulling things out. But then eventually pieces fell into place when I found a wire clothes hanger (check out this article if you'd like to find out more about the origin of the wire clothes hanger - the drawings are great!).
The result of my crafty afternoon is this enhanced, colorful wire clothes hanger... with a short description in 16 photographs. Again, it's an easy craft you could have your kids do or help you with on a rainy afternoon. What you'll need:
- wire coat hanger (the ones you get at the dry cleaner's) - bias tape, ribbon, or a piece of fabric - a piece of (masking) tape - white glue - optional: ribbon, rivet punch + rivets
Steps:
1. If you don't have ribbon or bias tape at hand, make your own (pic. 4 & 5) by cutting a long strip from a piece of fabric. Don't bother about cutting in bias, we want the ribbon to fray! Yes, fray! Although I had only a small piece of fabric, I cut one long strip from it. This is how: start cutting a strip lengthwise from one side to the other, BUT WITHOUT CUTTING THROUGH TO THE VERY END! Repeat, alternating sides as shown in the diagram below.
2. Attach the ribbon to the wire coat hanger as shown in pic. 6 and wind the ribbon around a couple of times to hide the tape.
3. Next, start twisting the ribbon around the wire all the way around. Don't be afraid of the fabric fraying - we like the effect! To make sure the ribbon is everywhere tightly twisted around the wire, check once in a while and twist the ribbon between your fingers as you work your way back to where you stopped.
4. At the bottom of the hook twist the ribbon around both wires and work your way up the hook (pic. 9 & 10).
5. Cut off the ribbon leaving a 1 inch end. Put on some white glue and next continue twisting the ribbon, smearing the glue in and over the fabric and such way that the tip is completely covered and there are no loose ends left (pic. 11-13).
6. Optional: Decorate with a 6. Optional: Decorate with a tag. I used stamps for this and the motto of our summer "Carpe diem". Make one for every family member and have their names on it, or if you plan for a summer party make one for every guest. The possibilities obviously are endless. Use the rivet punch to attach a rivet and tie to the hanger with a piece of ribbon. All done!
(All images and content come directly from Between the Lines, thank you!)
Put away those box mixes with tons of extra (and often undesirable) ingredients and make something from scratch. I flipped through one of Juliette's "kid cookbooks" and whipped up a batch of Applesauce & Banana Oatbran muffins this afternoon. And yes I've already eaten 2 myself. So pull out a favorite cookbook, ask a loved one for a good recipe or check out one of my favorite food blogs Smitten Kitchen for some homemade inspiration! Oh and of course make sure your ingredients are 100% certified organic and as local as possible!
Hello and happy august! I hope all of you are at it and doing eco better than before...in the high high heat of summer. I have been in the midst of some major transitions, but all in the best ways possible. I moved to Portland Maine in January, and went though some changes which was a true test. It unfolded as a scramble from near desperation to the discovery that I was and am fully capable of handling everything that comes my way and enjoying some of it too!! Life is beautiful, what can I say, but love each moment. I am proudly working at an organic grocer over-seeing the coffee and candy/chocolate departments. Couldn't be happier to participate in "good organic practices" and classes that teach me where our food and body products come from. (more on that knowledge at a future date). I am here to post some images of summer...that's all, just to share some of the homegrown goodness that's come from my work and need for organic produce and outdoor time. I've gained my summer's worth of vit. D and toned my body while working, weeding and tending to...also from running and playing on the beach. I've found some breath and balance too.
Until next time, I hope everyone feels good about their eco choices, and eat local, seasonal and fresh!! ciao, mariah
Oh, check out Lonny Magazine (love it!) and look for this article on page 41: Slowing It Down featuring Dominique Browning
When 'Do It Gorgeously' by Sophie Uliano arrived in my tiny little mailbox I thought, great another DIY book I'll never use that I've gotta review. Boy was I wrong!
A few nights ago I settled into bed after putting little Juliette to sleep, I pulled open the first pages and fell instantly in love with Sophie and her mission.
Her latest book (her first hit Gorgeously Green) tackles the everyday needs of the household, ranging from DIY household cleaning products, facial care, baby care to fun fashion how to's. All the while focusing on creating toxin free, less expensive and better products. With a chic and sassy edge of course. She does an amazing job of making the unimaginable seem easy, listing where to get all the items you'll need to make and create everything in her book.
I've already dogeared a handful of pages and have lots of mini projects to begin thanks to her no nonsense easy instructions, many with accompanying illustrations. Here are some of my favorites:
Natural Deodorizer p.89 "Once a week, pour 1/2 cup borax powder into your diaper pail, leave for half an hour, then shake the borax into your trash can." Our diaper pail has been extra offensive lately and this tip couldn't have come quicker. Borax is on the top of my shopping list!
Homemade Almond Milk p.209 1 cup raw almonds & Filtered Water
1. Put the Almonds in a glass bowl or pitcher with 4 cups of water and place in the fridge overnight 2. Rinse with water, then put in the blender with filtered water 3. Strain the mixture through cheesecloth into a pitcher 4. If you want to make it sweeter, you can put it back in the blender and add 3 or 4 dates (they must be soaked in water for a couple of hours), or make a delicious gorgeously green shake by adding half a banana, 1 tsp. of any leafy green, and 1 tsp. of agave syrup
There are dozens upon dozens of amazing ideas in here including recipes for organic teething biscuits, milk paint, leather protector, baby wipes, mint jelly and my favorite the baby pillowcase nightgown! In addition to tons of recipes there's easy to follow instructions for making things such as a sassy apron, compost bin, boiled wool mittens, a medicinal garden, a bookcase and homemade drapes. Phew I'm exhausted just listing these!
Once I've tackled those, I plan on making Juliette a Lavender Cashmere Comfort Bear out of an old cashmere sweater and some dried lavender flowers!
Run don't walk to Pre-order Do it Gorgeously from Amazon or log on after June 1st to get your copy! This isn't the last you'll hear from me on this book, I'll post tips and stories as I create!
A friend of mine recently wrote an article entitled something like 'Having a baby isn't eco-friendly'. I totally agree! But, I have found ways to stay true to my eco-minded beliefs.
When you have a baby, you learn that things are always messy and you are always cleaning up. Whether it's diapers or wipes or the many paper towels you go through. Your always trying desperately to keep that little muffin of yours looking their cleanest. I debated cloth diapers, only to discover the trade off isn't always as eco-friendly as you may think. I looked into the disposable-cloth hybrids and quickly shot that idea down when I saw the price per unit! There are some things I just can't afford. And I'm not going to let the guilt weigh me down every day. What I can do is keep up with what I can do. Here are some ways I DO stay eco-minded with my little Juliette.
*I support many organic and eco-minded companies such as, Seventh Generation, Earth's Best, Alba Organics, California Baby, Little Twig, Kate Quinn, Gerber Organics, Small Changes by Kee Ka, Kee Ka, Babyganics and more.
*I make Juliette's baby food, which cuts down on not only my costs, but in fuel costs, manufacturing costs (all those containers). I stick to organic ingredients (some things I'm not willing to compromise on). On occasion I've given into time constraints and given her Earth's Best Organics baby food, saving the jars to fill with my own concoctions later of course!
*I buy Juliette lots and lots of toys made from wood! Also, organic fabrics. She loves her MiYim toys and wood rattles.
*I am a huge purveyor of used goods, I support 2 local buy/trade/sell baby stores and have happily accepted many hand me downs. I also have given hand me downs to those having babies and am storing Juliette's clothes for another baby someday. The more babies that can use each item of clothing, toy or baby gear the better. It's a pass it on theory and it makes me happy! I love having her wear something that had another life, brought another baby happiness or was part of a baby's room.
As Juliette gets older I'll be taking her to the farmer's markets each weekend to pick out our week's goods, introducing her to each vendor and teaching her about the origin of each item. I want her to know that strawberries are not a winter fruit and that sweet potato was her first food! I can't wait! I am not going to hide vegetables in her food, I want her to learn to love them. I want her to play in the dirt, get messy and above all have fun. I can be clean up patrol, that's my job!
Many of you know of my hankering for jars, I collect great shaped ones I see, I save way more than I will ever need and I'm always trying to come up with new uses for them. Let's review, I use them to store my qtips, cotton balls, loose candy, drinking glasses, vases, bulk food storage, candles...the list goes on. Now that I have a baby and am making my own baby food I'm using my cute small jar collection even more!
I recently stumbled upon this great site which sells the more darling jars and I knew I had to share. They also have kits for jar labeling! I think I might be in trouble. The site is Burgon & Ball and they've got a ton more amazing things I've gotta check out, but these jars stopped me dead in my tracks, I think I like the Delicious Jam jar one most of all.
Uh oh, I just discovered they sell their own line of skincare, I'm in trouble now for sure.